Well, it’s been about a month since we’ve started building our 24inch wingspan Miles M.18 rubber powered flying scale models. Already, we’ve got a couple of ships nearly ready for that first test glide.
Our modelers continue to improvise a bit as they go, and as always it’s interesting to watch this play out.
Preparation & Covering
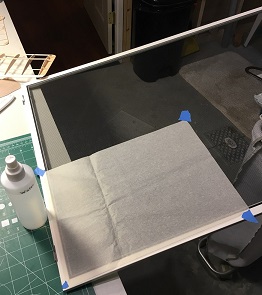
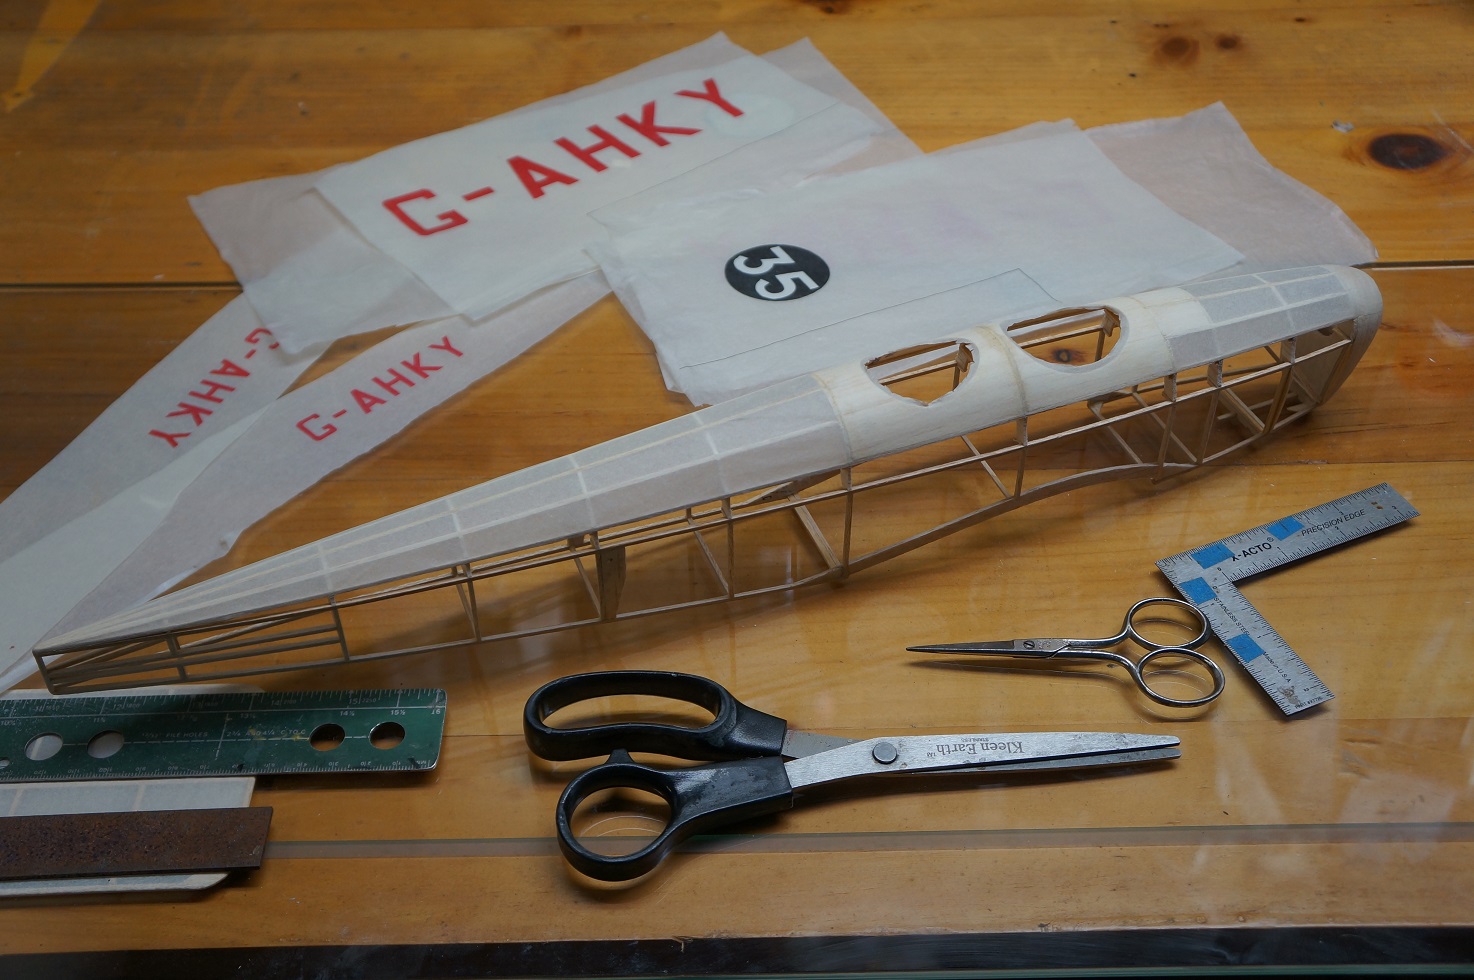
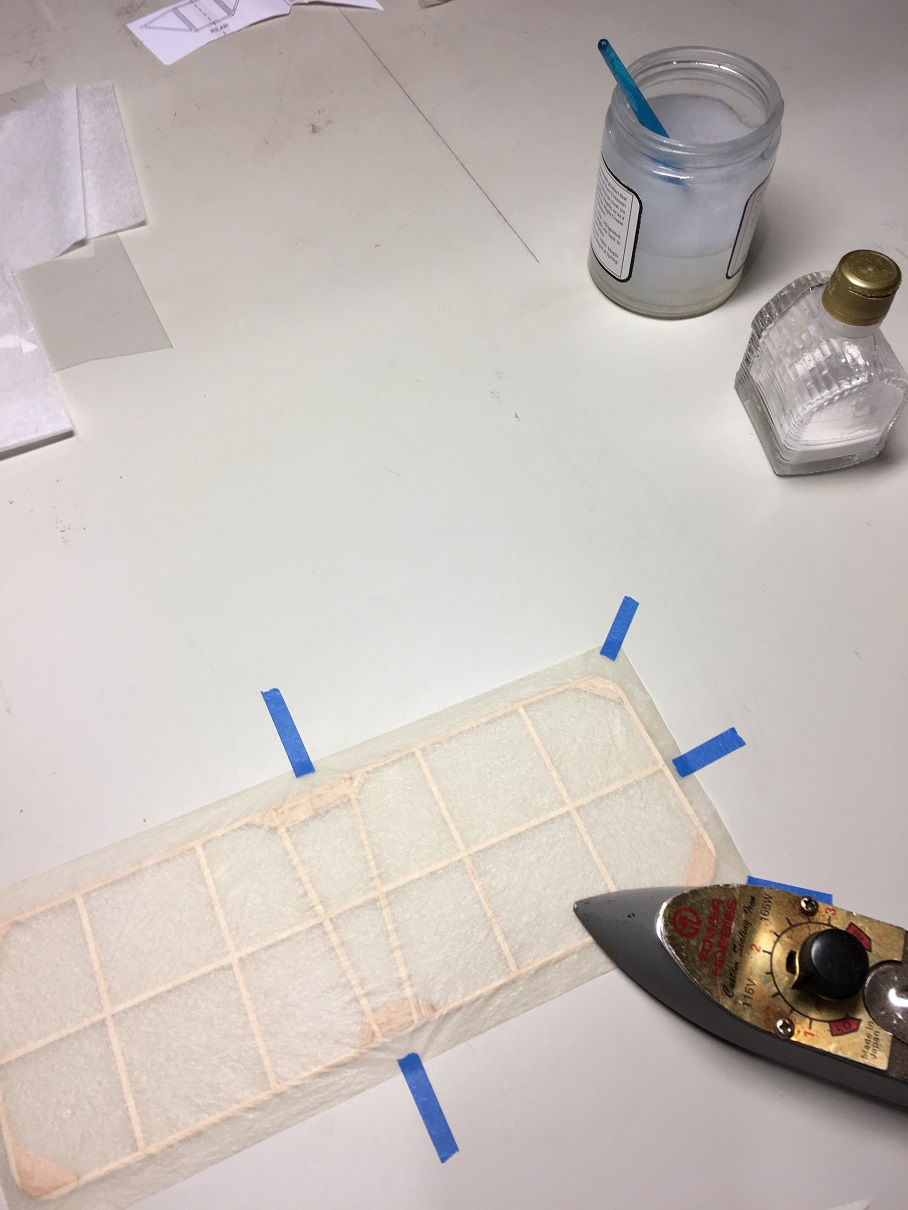
Proper preparation is the secret to covering any framework. There is a sequence that leads to a good looking and flying model at the end. Sanding the framework and scalloping formers between stringers to smooth raised spots that will cause wrinkles in the covering later on is important. Pre-shrinking tissue, applying color and markings are part of the preparation process too.
Right off, our modelers chose different color schemes, methods and techniques. One modeler chalked his tissue light cream color (video) for the Kings Cup scheme specified on the construction plan, while another used white tissue to replicate the restored M.18 displayed at the Scotland Museum of Flight.
Both elected to pre-shrink their tissue covering to reduce flying surface warps – one shrunk the tissue on a traditional wooden frame and the other used a common window screen.
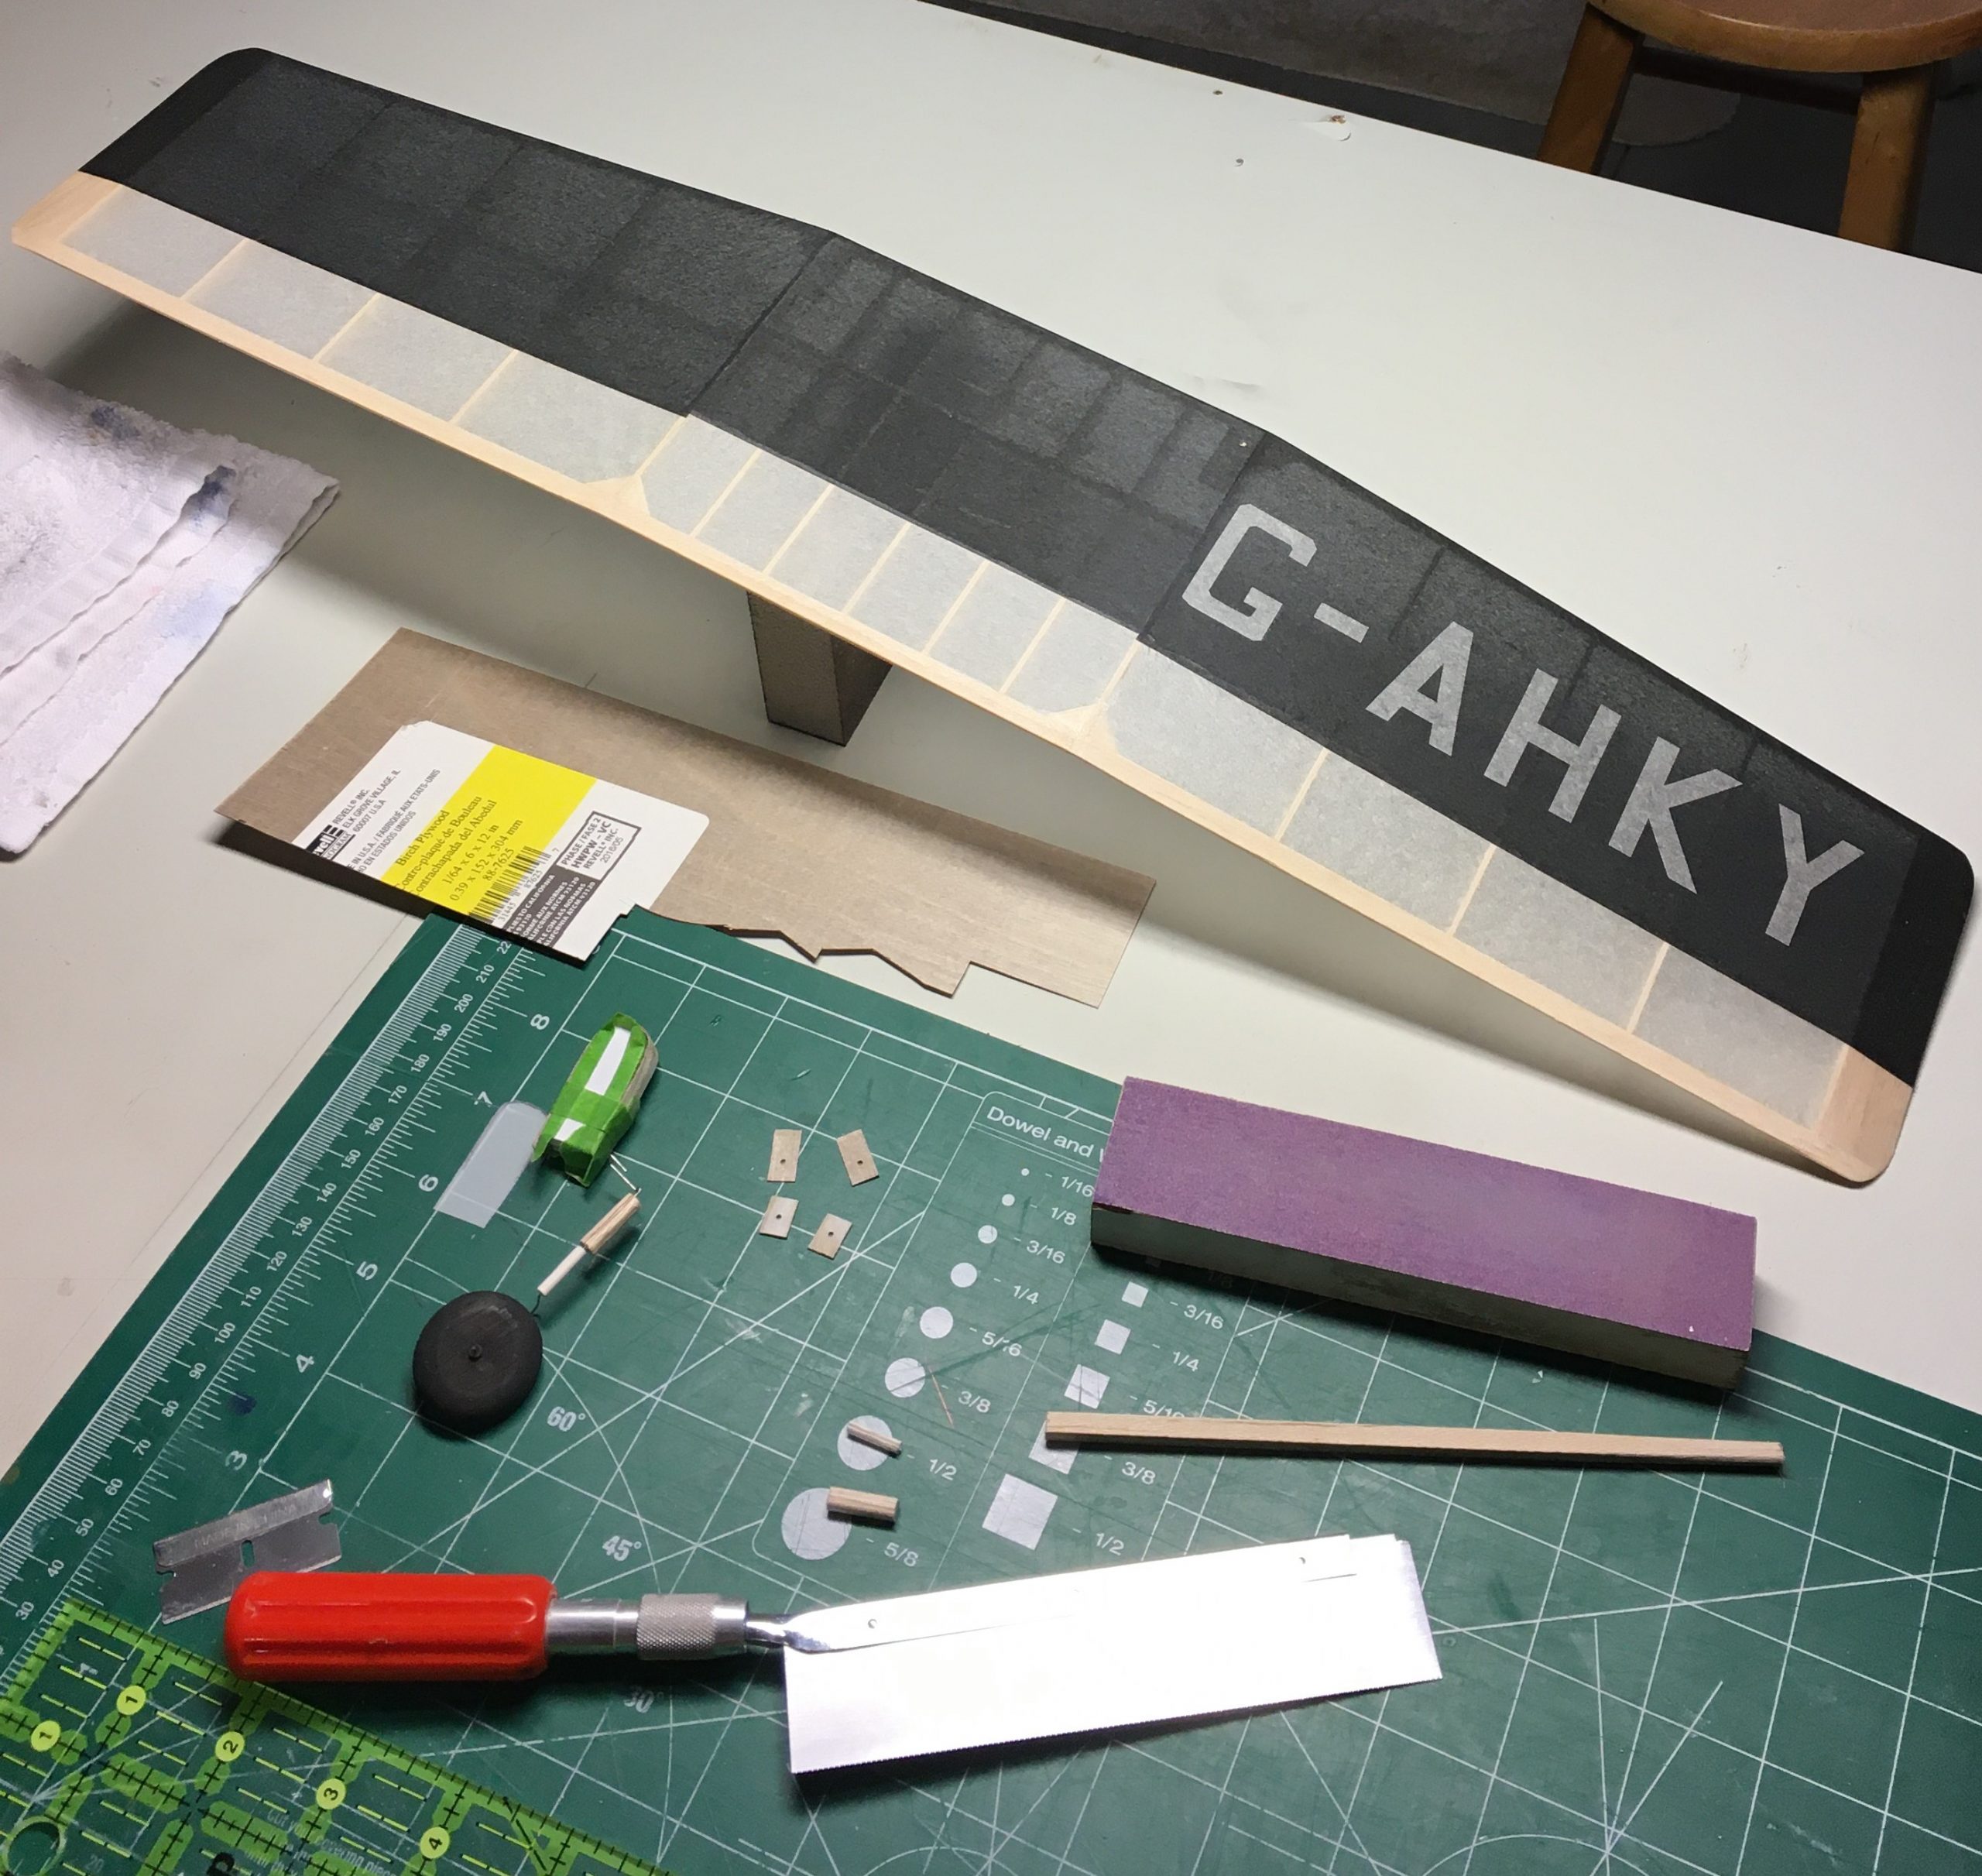
Their paths really diverged when it came to adhering the tissue to the framework. One chose a more traditional thinned white glue (70/30 water – Elmers mix) applied to the frame with a brush, while the other used Deluxe Materials Cover Grip (thinned 50/50 with water) applied with a covering iron. Both used cut tissue markings, applied with either spray cement or thinned Cover Grip. The Kings Cup markings were chalked to deepen the color and applied to tissue panels before the tissue was applied to the framework. A final finish coat of Krylon Satin #1323 was used on the Kings Cup model, while Deluxe Materials EZE Dope (thinned 80/20 water – EZE Dope) was used on the Museum of Flight M.18 model.
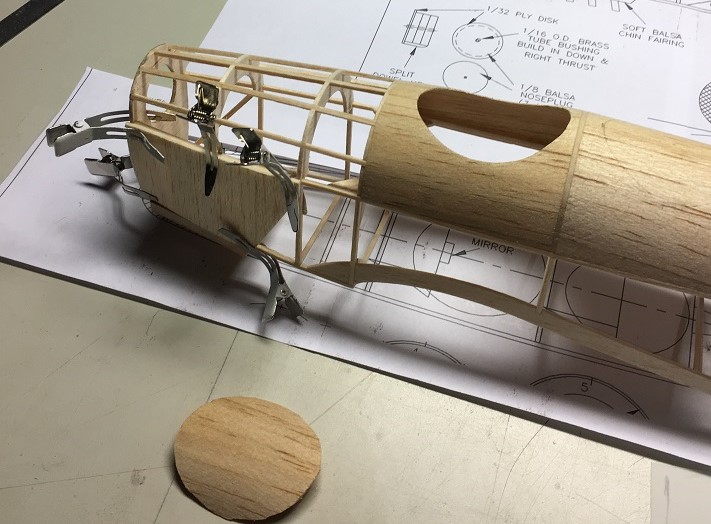
Cowling Installation
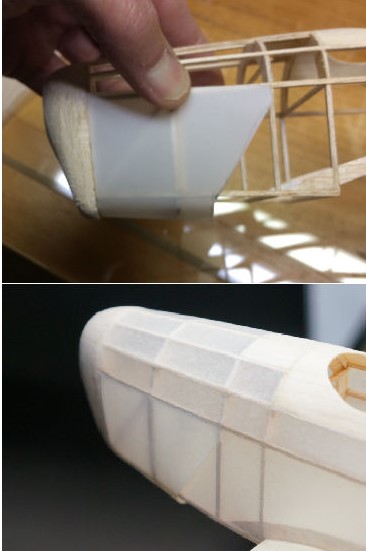
The Miles M.18 construction plan doesn’t specify a 3D cowling, but both modelers added cowl panel detail to make the model more realistic. One modeler used light sheet balsa side panels shaped to contour, while the other used a tissue over vellum approach. In the sidebar photo, note the effective use of hairclips as clamps to secure the sheet balsa to the fuselage framework while the cement cured.
The drafting vellum cowl uses 1/16 square balsa doublers at the first two fuselage uprights which, once sanded to shape as formers, provide support for the wraparound cowl. Once the cut vellum cowl was fitted to the fuselage nose, cream chalked tissue was adhered to the vellum with a spray cement. The fuselage framework was covered and then the tissue covered vellum cowl attached to the nose formers with Sobo Craft Glue. A trim iron set to low heat was useful to cure the Sobo when installing the vellum cowl. This approach eliminated the need for the lower cowl balsa block, but a former is required at the crosspiece just aft of the noseblock. Rough patterns for this former, the vellum cowl panel, and the cockpit sheeting are provided in the download at the end of this post.
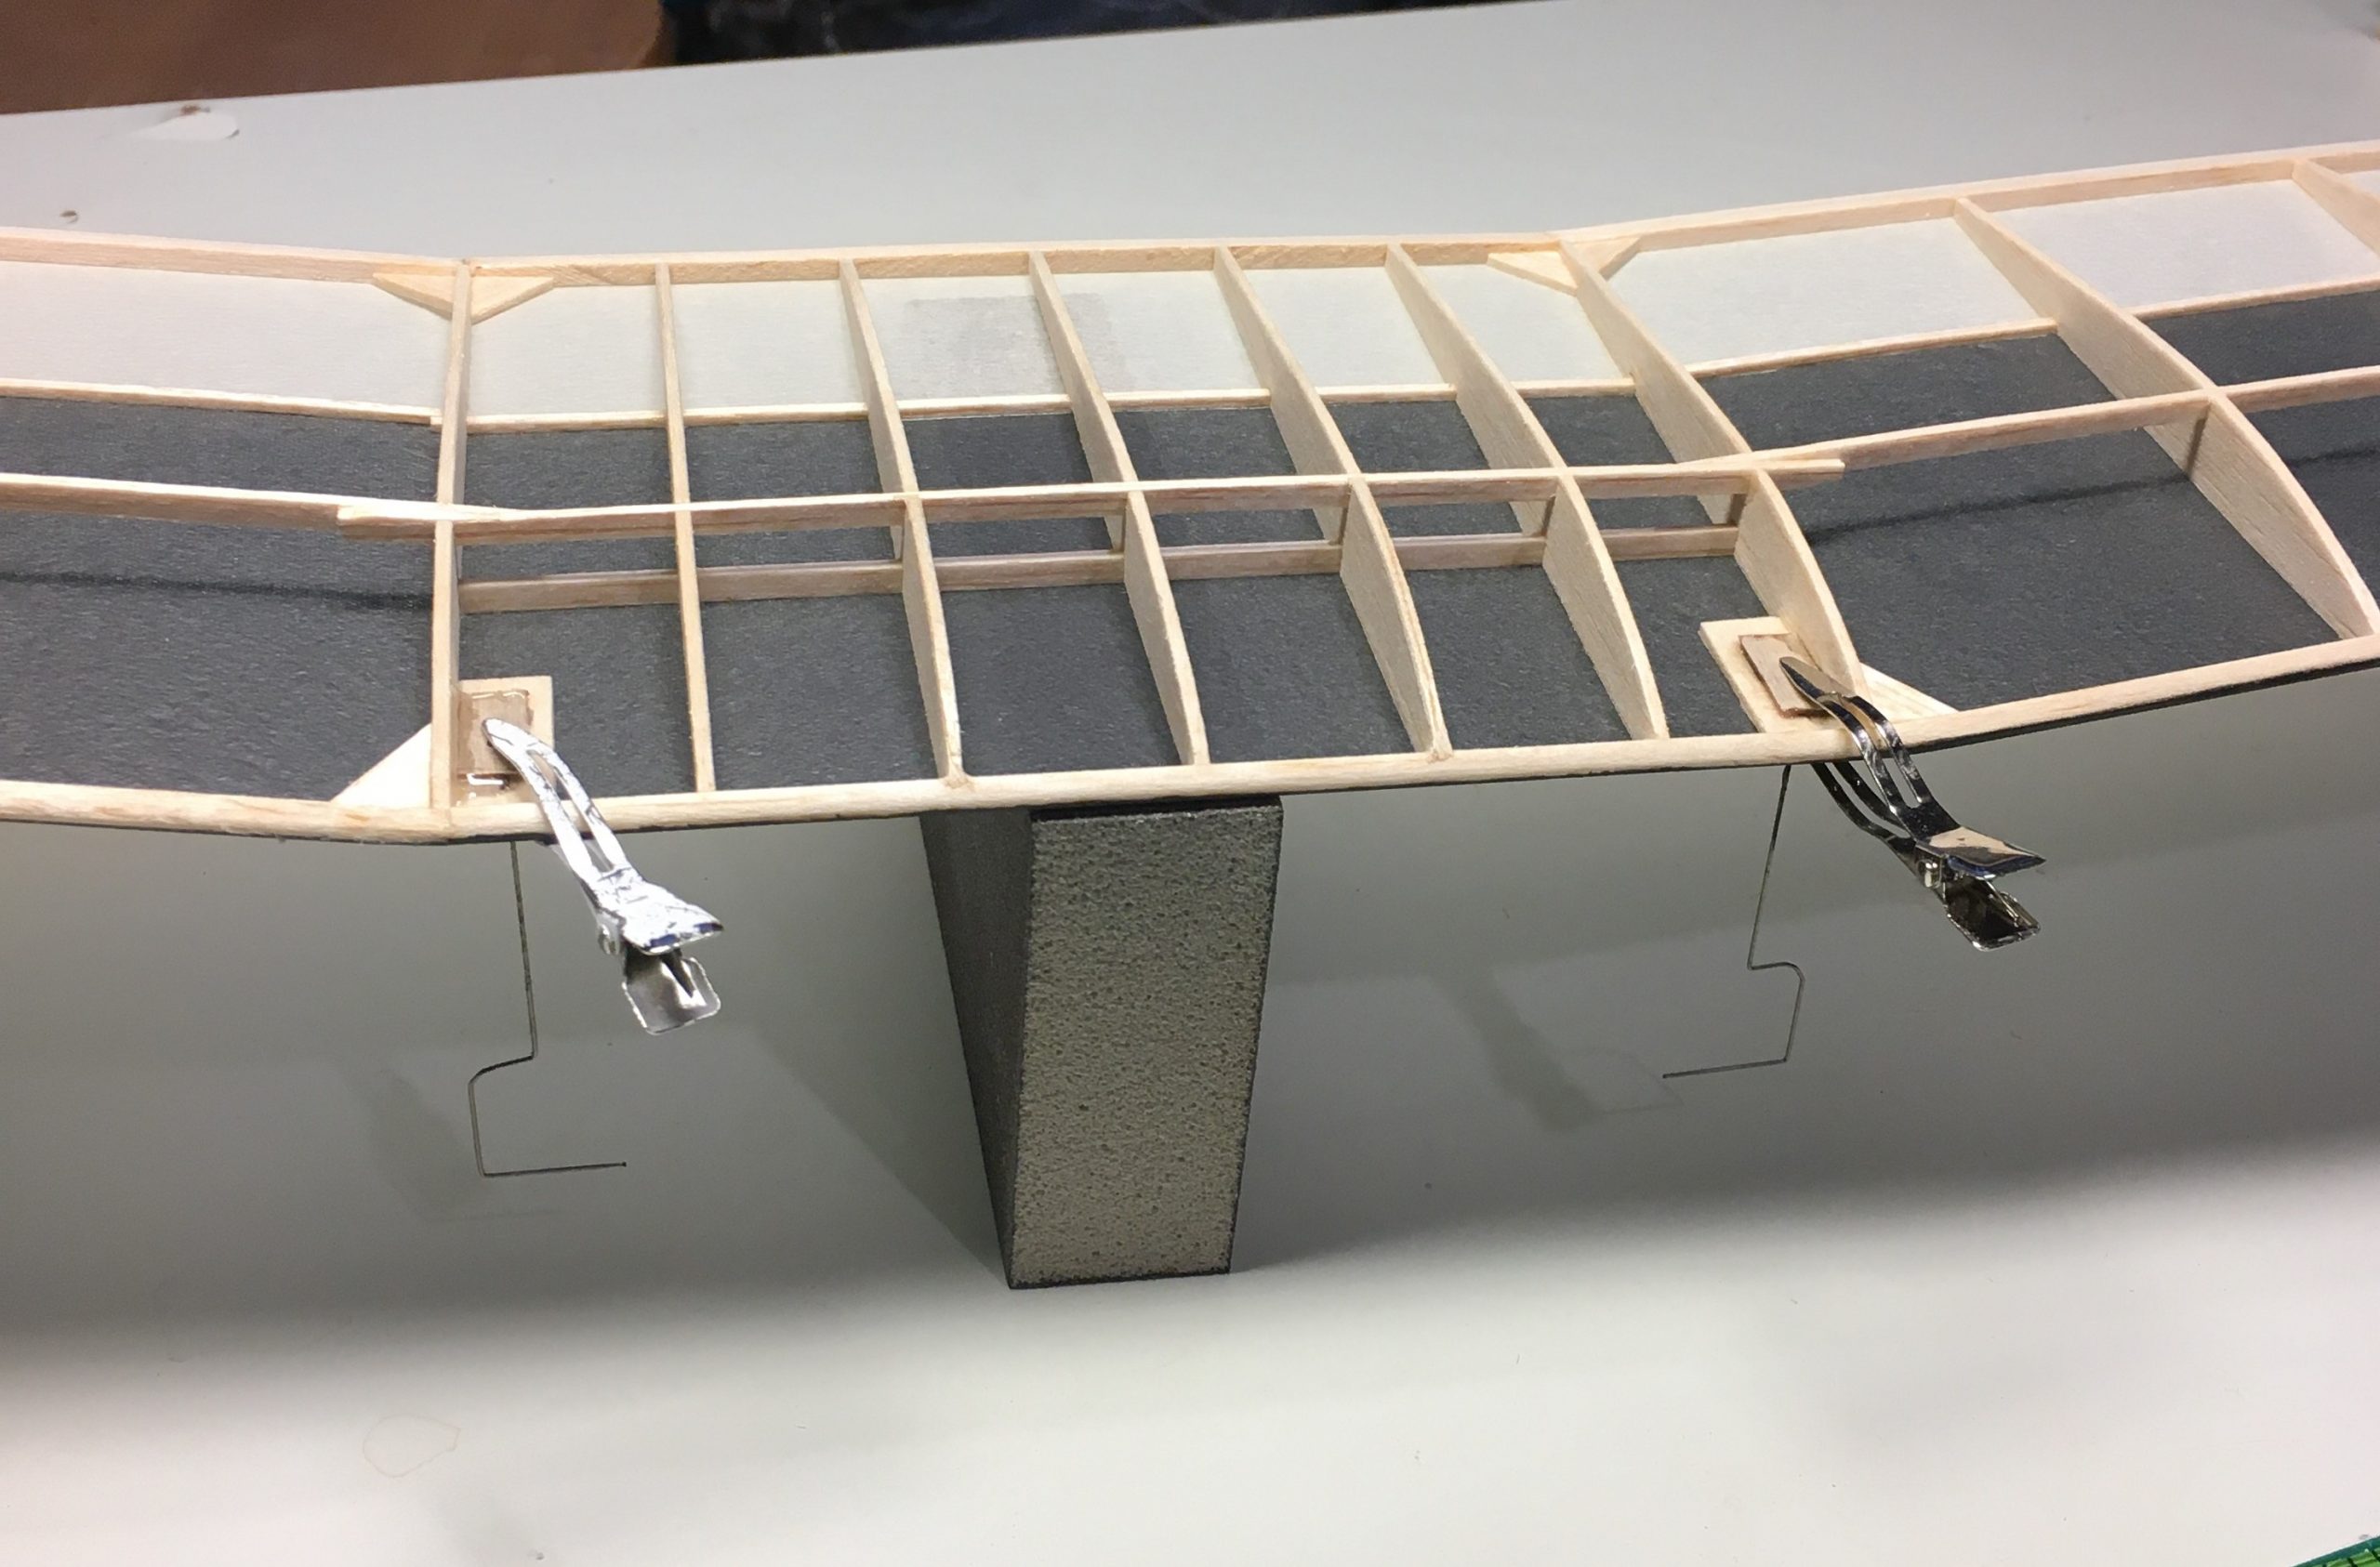
Landing Gear Wire Installation
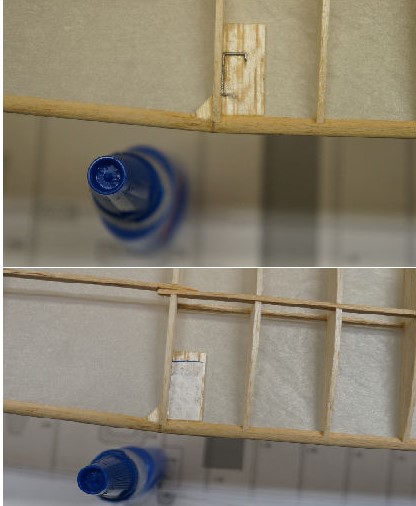
The M.18 model has wing mounted landing gear wires which must be installed securely to withstand the strain of hard landings. Here our modelers followed the construction plan, cutting the mounts LGM-R and L from medium-hard 1/16 sheet balsa. A 1/32 sheet balsa doubler was found to be helpful on the underside of LGM which when sanded faired nicely with the wing Leading Edge. The .020 music wire legs (right and left) were carefully bent per the plan. After the wing underside was tissue covered, the wire LG legs were threaded through the hole in LGM and cemented in place with cyanoacrylate glue. For additional strength, one modeler CYA’d a 1/64 plywood plate on top of the wire set into LGM, while the other used a simple Tyvek patch. A vertical gusset at the back of LGM to rib W2 was also installed to add strength. The wing upper surface was covered after the LG leg wires were installed.
Closing Build Update #3
Ok, lets close this third M.18 build update. We’ve got several Miles M.18 models coming into the final assembly stage. In the next update we’ll show the assembled models, discuss some specifics such as weights, flying surface setup, and prop/rubber combinations. One of our modelers has even fitted skis.
Until then, download the pattern sheet below, post any questions or comments and most of all keep those balsa chips flying!
Download:
24in Miles M.18 FULL SIZE PATTERNS
Tissue covering & markings, Cowling and Landing Gear installation – we’re closing in on finishing this model!