It’s been two weeks since we announced this online build and we’ve got 3 folks building the 24in wingspan Miles M.18 Mk2 free flight rubber scale model. Two modelers are on the East Coast and one in the Pacific Northwest. All have completed the tail framework, one has constructed the wing and two have made solid progress on fuselage construction. We’ll share some to-date pics along with some of the techniques employed so far.
Initial Laydown
Two builders “tiled” the PDF plan and printed the appropriate sections on their home printer and dove right into the build. One got the PDF file printed at Arch D size at the local print shop and cut the plan into sections for the build.
Wing
While one modeler has constructed the wing, we’re going to hold off on coverage there until the next update when all builders should be well into that phase. Let’s move on to discuss M.18 fuselage construction, where two builders have been progressing more or less in lockstep. It’s interesting to see their similar, but slightly different approaches.
Fuselage Build
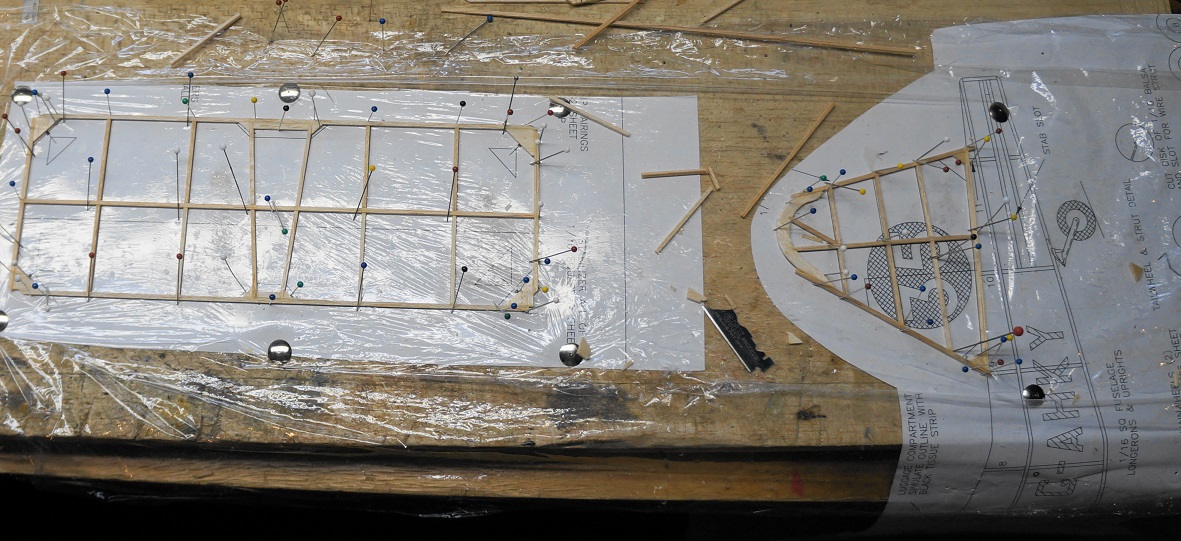
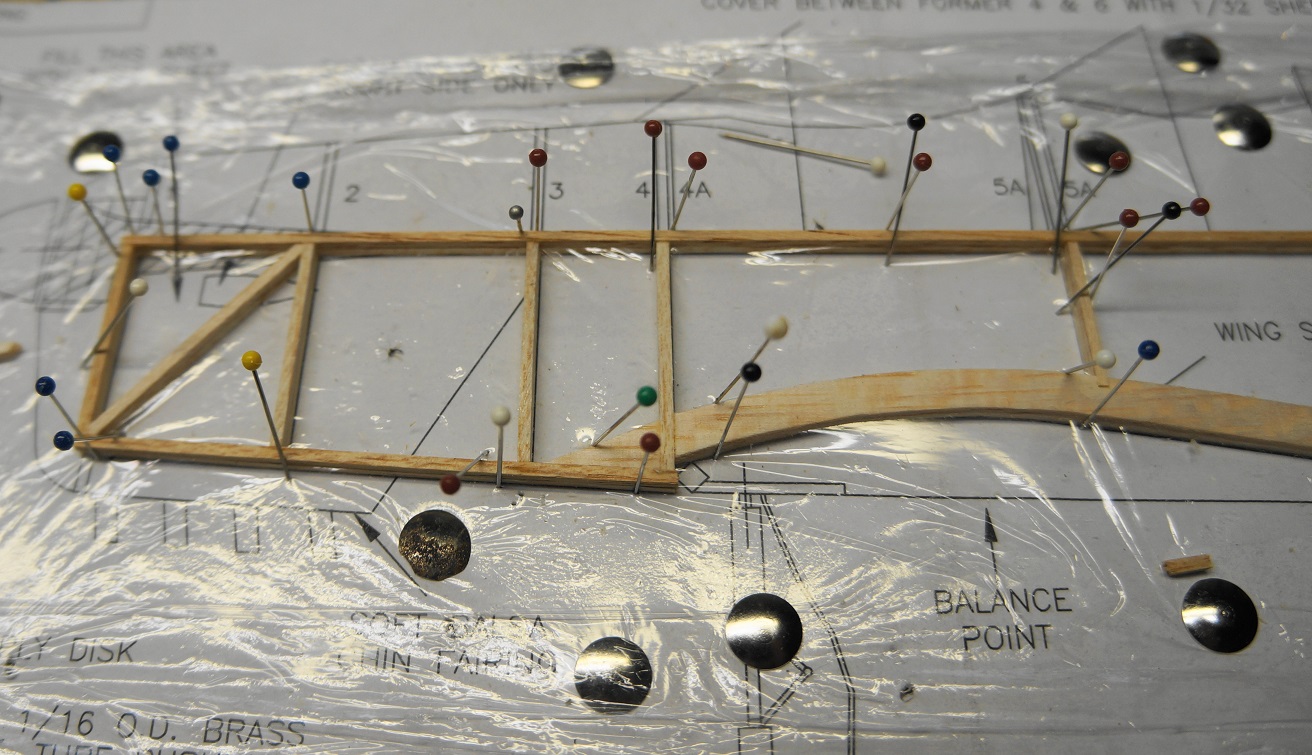
Both builders constructed the fuselage side frames first in the conventional manner over the plan side view. One builder constructed the second fuse side over the first which is a technique to help ensure the second side frame is a duplicate of the first fuselage side frame. This helps achieve a straight and square fuselage box later. With this technique, the plastic cling wrap that the first fuse side is built on is folded over that constructed first frame to prevent the second frame built ontop from cementing to the first one underneath.
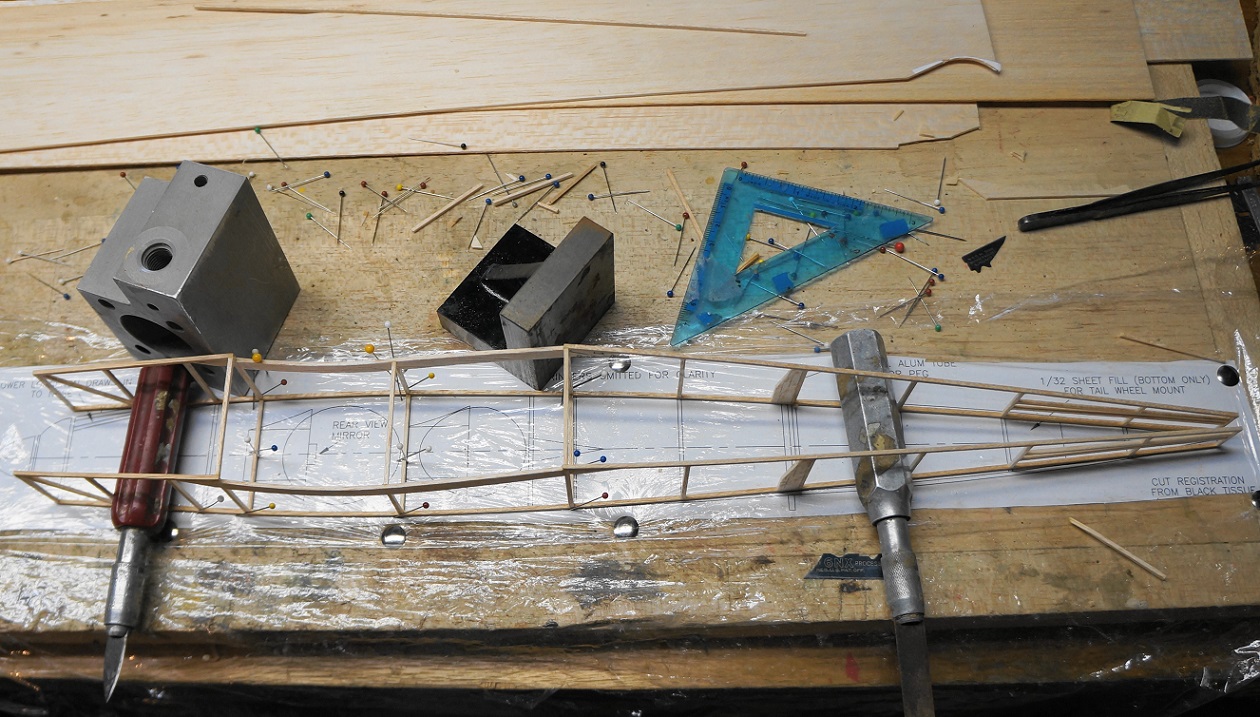
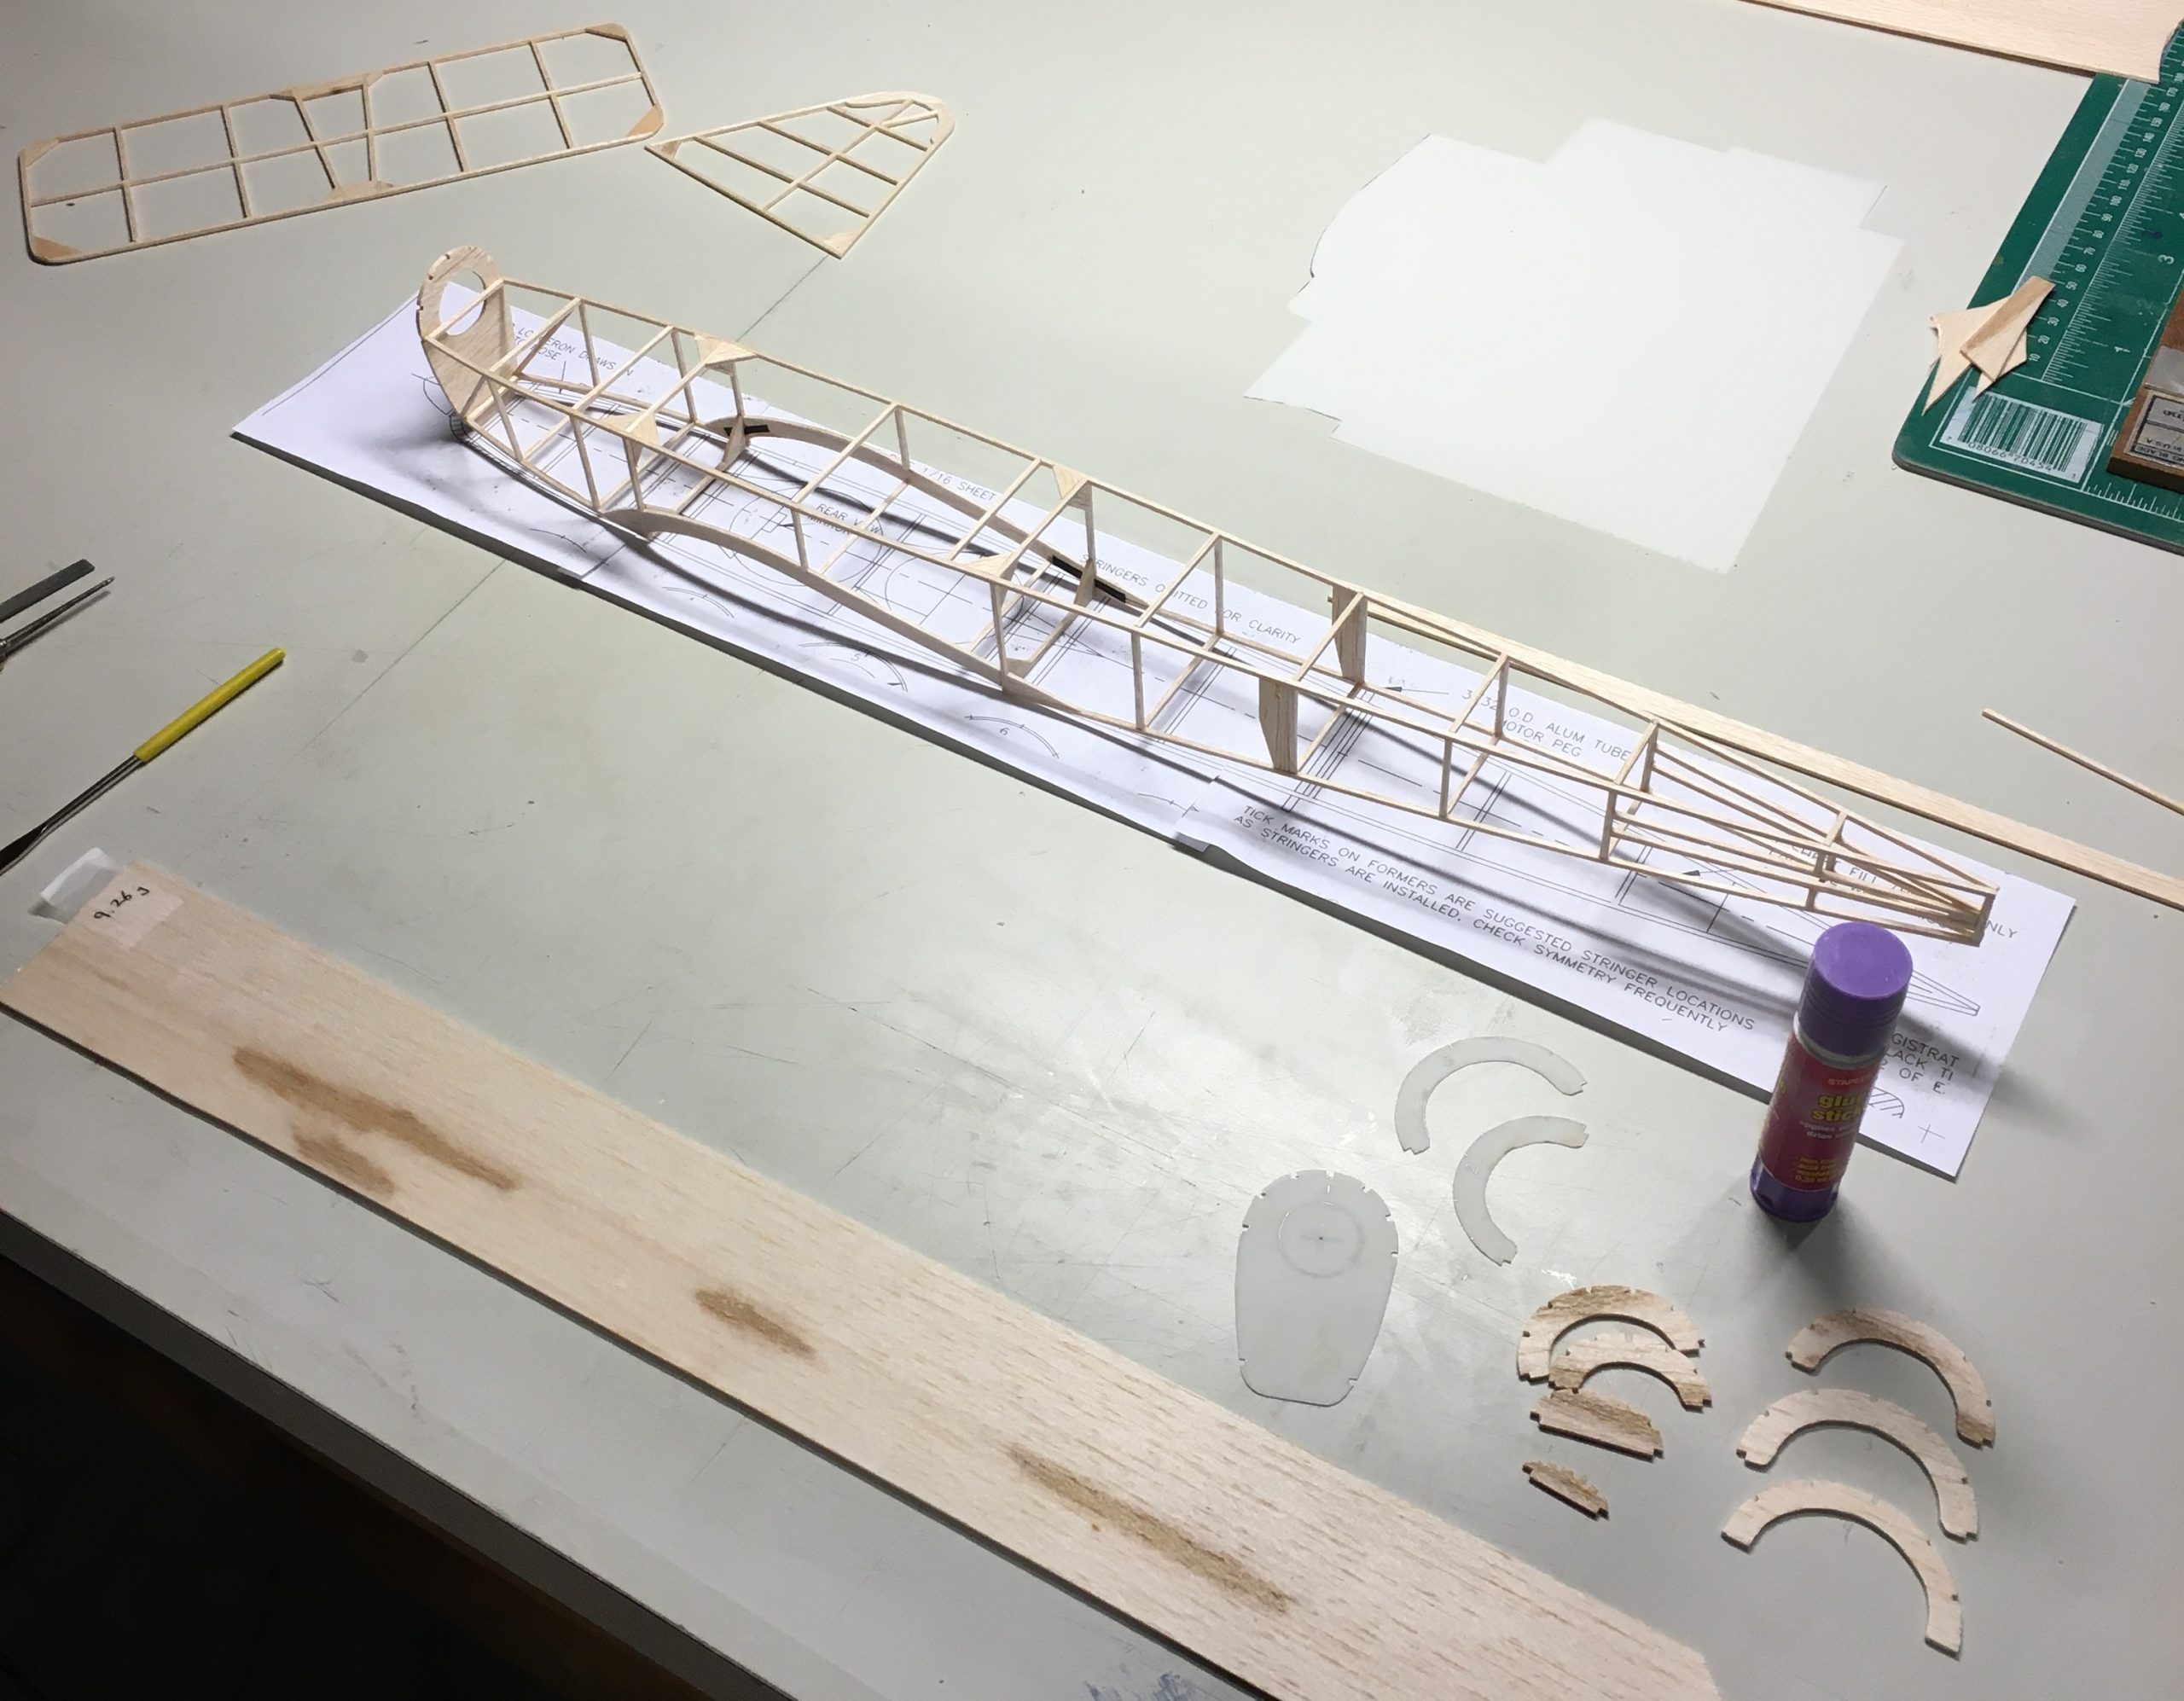
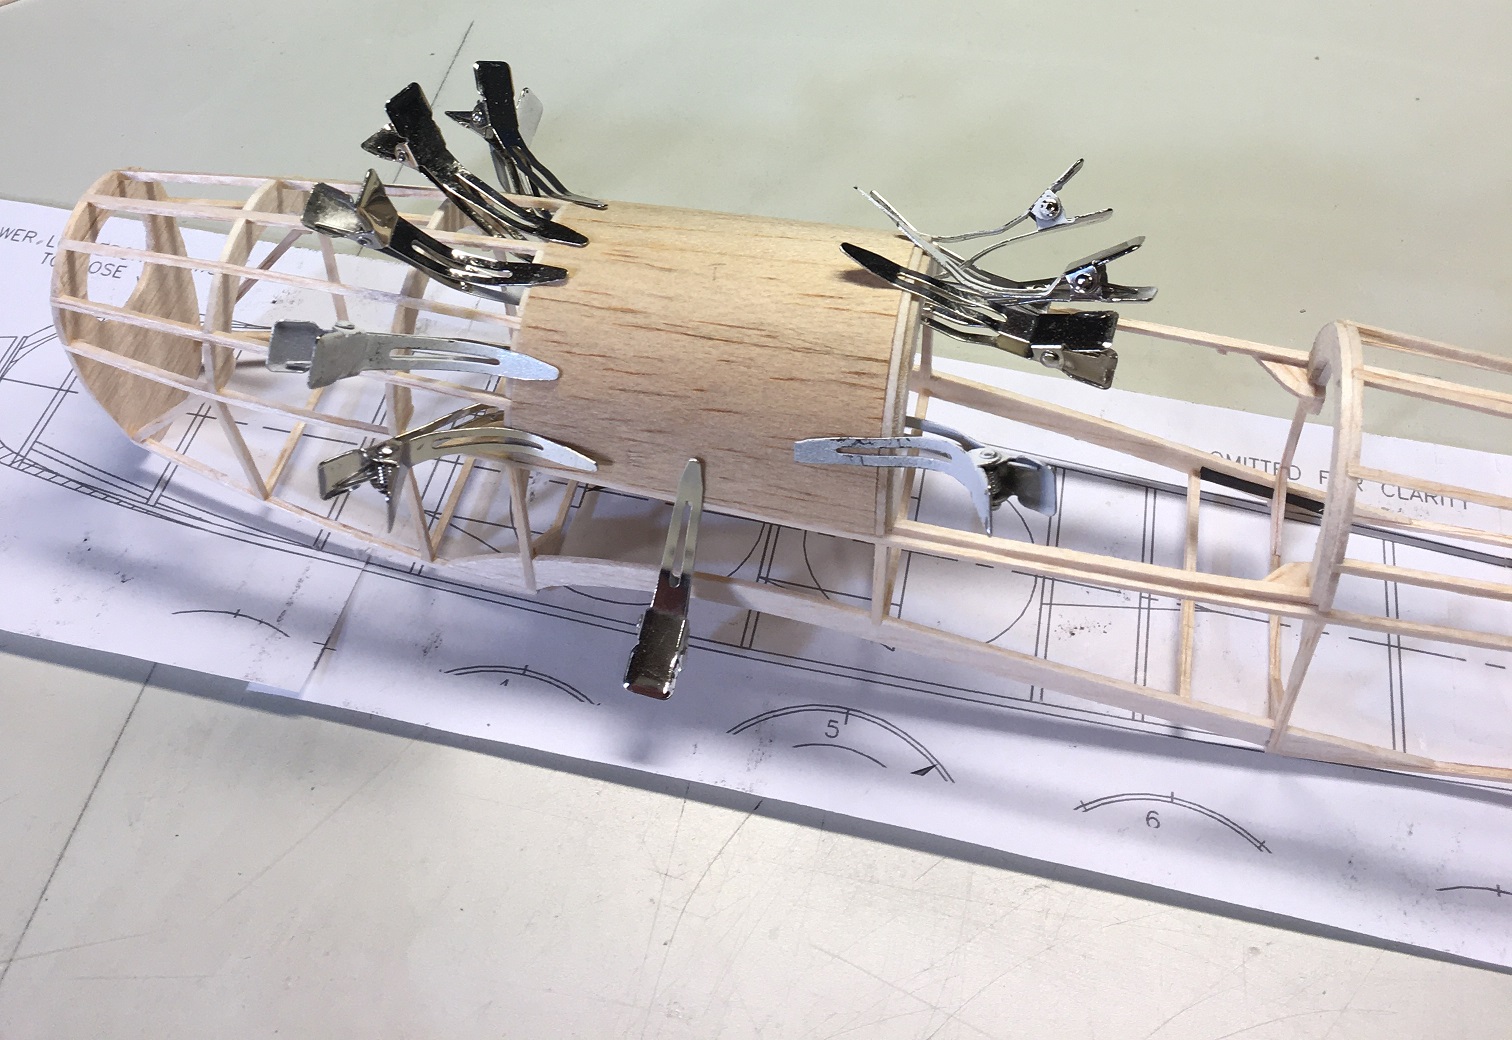
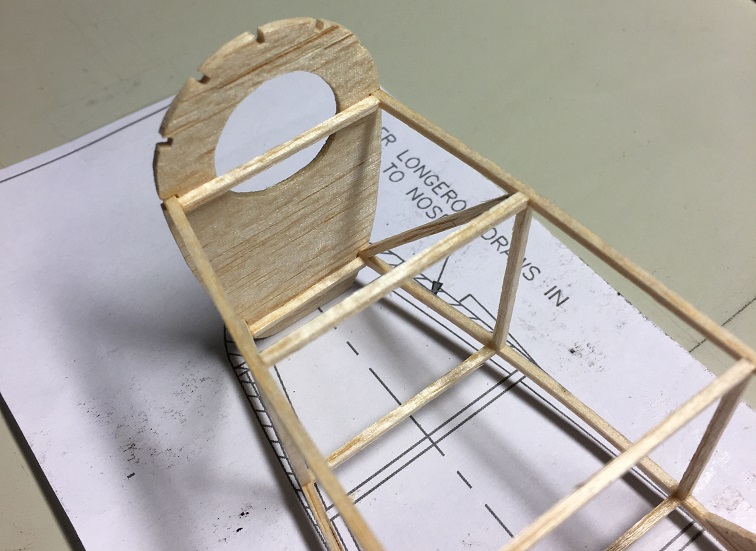
Building a square balsa stick box is a challenging task and here’s where it’s interesting to compare the approach the builders took. Both builders built the M.18 fuselage box upside down with the straight upper longeron held flat to the building board. Both modelers used tools to hold the side frames to the board and keep them square while cementing the fuselage crosspieces in place. While not specified on the plan, both modelers built the fuselage box with 1/16 sq balsa crosspieces installed along the top longeron. These crosspieces will be cut away for rubber motor clearance after fuselage formers, stringers and cockpit decking have been added. One builder used pins to hold the fuselage side frames to a conventional balsa building board, while the other used strong magnets to hold his side frames firmly to a flat metal desktop “building board”. Both used 90deg square blocks to check and maintain alignment as crosspieces were added top and bottom at the side frame upright positions to construct a square fuselage box. One used magnetic squares. while the other used heavy machinists blocks (see My Favorite Tools #2 video). Both modelers drew in the top and bottom longerons at the nose using Former 1 to provide rigidity and lock the box together at the nose. Former 1 was the first fuselage former to be installed after the fuselage box – with all crosspieces installed – was lifted from the building board.
Closing Build Update #1
This is a good place to close this first M.18 build update. The tail has been constructed and two modelers have the fuselage box completed and are adding formers, stringers and cockpit decking (more on that in Update #2). One modeler has the wing constructed and is moving into the fuselage build. More on the wing build will be provided in the next M.18 build update so stay tuned.
Until then, keep those balsa chips flying! Don’t forget to post your constructive comments or questions (none are too basic).
Additional info:
My Favorite Tools #2 – Machinists Blocks ; youtube
3 modelers are building the 24in wingspan Miles M.18 free flight rubber scale model. Join in on the build and/or share positive thoughts via the Comment Forum.